
Hey all! Hope everyone is having a great day so far.
So for people who I’m connected to on social media, you probably already know this. For those who don’t, I’ll let you in on a little secret — I’m kinda in love with Japan. I’ve visited Micah in Japan three times in the past six months, and I haven’t even stepped foot outside of Kanto Region (besides Yamanashi for Mt. Fuji and Nagano for skiing)!

With this vast experience I have (LOL), I’d like to share with you all the best bits of my trio of travels. A 10-day itinerary packed to the brim, this activity plan is not for the faint of heart (or flat of feet). Prepare your most comfortable shoes and join me as I lead you to the best places I’ve been to in Japan.
Notes:
Yoshinocho is home base, since that’s where I stayed during my visits. The plan is easily adjustable if you plan on staying in Tokyo.
The flight taken is MNL-NRT which lands at 10:25 AM, and NRT-MNL leg leaves at 11:45 AM.
Day 1 – Arrival

The plane should touch down at Narita at 10:25 AM, meaning your first steps off the plane will be around 10:30. Try your best not to take too many pictures upon arrival, as it is imperative that you to get to immigration early to avoid the lines. Getting through will take around 10 minutes, which will allow you a good spot at the baggage carousel. 30 minutes should be enough time for your bags to show up. While waiting, if you are traveling as a group, have another member of the group get your pocket wifi. Internet connectivity will play an absolute crucial role in how your trip will turn out. I booked through Klook the last time, as it was half the price of the other options at the airport.

In trying to catch the earliest Narita Express bound for Yokohama, which should set you back JPY 4000 round-trip with the help of your passport, there isn’t really much time to have a proper meal at the airport terminal. I suggest that you grab a sandwich or onigiri from one of the convenience store kiosks you come across and have that while on the train. Worry not as there will be no shortage of great food the rest of the trip (Click here for a list of the best things I ate in Japan!). Based on experience, the 12:23 PM train should be easy to catch. Don’t miss it though, as the next train leaves at 1:17 PM, nearly an hour later.

Arrival at Yokohama is at 1:44 PM, wherein you should reward yourself with some lunch. There are a myriad of choices near the station, and the streets are stroller-friendly. It is also here where you should get a SUICA/PASMO card, which is an integrated card you will be using mostly to pay for train rides, but is also accepted at vending machines and lockers. Initially loading JPY 10,000 should get you through at least half the itinerary.

After lunch, head on over to Yoshinocho. Arriving at around 3 PM, I suggest settling down, then taking a much-deserved nap (because sleeping on the plane doesn’t really count with all them crying babies). 2 to 3 hours should be enough to revitalize the body, which leaves you with ample time to check out the Ramen Museum. Make sure to take plenty of pictures, as the place is gorgeous. Also, know that there are tasting portions at most of the restaurants, which will leave you sample multiple offerings.
Once you tire of slurping, it is time to go home. Don’t worry about not having done much today, as you will need tonight’s rest to survive the barrage of activities that are yet to come.
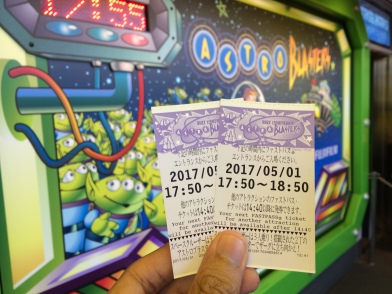
Days 2 and 3 – Tokyo Disneyland and Disneysea

- Get a 2-day pass (JPY 13,200) and print them in advanced.
- To choose a date, refer to to the crowd forecast site. Avoid weekends and holidays if possible.
- Confirm park operating hours.
- Check the weather forecast, as rain and cold can really wreck a good time.
If you want to get the most bang for your buck by maximizing the number of rides, be there EARLY. Fast Passes, which allow you to come back at a set time and line up in the express lane, are your friend, but these run out incredibly fast (especially at Toy Story Mania!). You are eligible to get Fast Passes every 2 hours, so plan accordingly.
Honestly, it is nearly impossible to make back the value of admission through rides alone. At Disneyland where lines are generally shorter due to there being more kids that don’t care as much about rides, 10-12 rides in a day is doable. At Disneysea, where lines get CRAZY (Guess who lined up for nearly 2 hours at Toy Story Mania!?), 6-8 is already a decent haul.
Where you CAN find value is appreciating the intricacies in every sector. Toontown in Disneyland is a favorite of ours with the bustling color and interactive decor, while Mermaid Lagoon and Arabian Coast are absolutely gorgeous, with the latter being supremely magical in the evening.

Also, plan around the shows you want to see. The blockbusters usually utilize a lottery system to hand out tickets, so it is best to try your luck after getting your first Fast Pass so you can choose the correct time of the show. We’ve been unfortunate in our two attempts to get a seat at Disneysea’s Big Band Beat, but we rode Coco’s luck into getting tickets for Disneyland’s One Man’s Dream.
Day 4 – Tokyo West Side

Start your day off with a memorable brunch at the famed Tsukiji Market. Have your fill of the freshest seafood around and don’t be afraid to try anything that tickles your fancy. Stay alert though, as the place is almost always crowded, and seeing that it is an actual market there WILL be people who aren’t there as tourists.

After a brunch that will make you question your life choices, Shinjuku Gyoen is where you go to walk off some of the food you just devoured. As one of the largest parks in Tokyo, it is the perfect place to take a leisurely stroll as it houses three gardens — Japanese Landscape Garden, French Garden, and English Garden. Spring is the best time to visit if cherry blossom selfies are your thing, while autumn is equally beautiful due to the colorful changing of the leaves.

Once done contemplating amidst the tranquility, pick up the pace at Takeshita Street in Harajuku where you’ll find all sorts of oddities. Housing stores boasting of the latest fashion trends, the vibrancy of youth is the lifeblood of this area. Grab a bite to eat while window shopping if the stomach permits, with the Japanese being particularly fond of the crepes.

Meiji Shrine is just a short walk away, but be sure to check out the day’s operating hours as we were unlucky enough in the past to be greeted by a sad-looking “CLOSED” sign. An hour is more than enough to appreciate the shrine and its surroundings, but the highlights for me were the massive torii gates.

The day’s last stop is the world-famous Shibuya Crossing. The best time to cross and take videos and pictures is in the evening, when the sea of people converging is backlit by the bright lights from the nearby stores. When you finally have that perfect Instagram story, you can start shopping! Shopaholic favorites Forever 21, Uniqlo, Gap, and H&M are all within a stone’s throw, and once you’ve had your fill of retail therapy (or your credit limit runs out), dinner options are plentiful so feel free to explore.
Since tomorrow’s activity will require you to be fully-charged, succumbing to an early night will have your tomorrow-self thanking your today-self.
Day 5 – Hitachi Seaside Park

Get up bright and early to start your commute to Hitachi Seaside Park, as travel time is around 2.5 hours from Yoshinocho (1.5 hours if coming from Ueno). Don’t worry as you will have an hour or so of sleep in the train uninterrupted.

The entrance to Hitachi Seaside Park is a measly JPY 410, so really the bulk of the incurred costs will be from the transportation. Check the bus schedule as you arrive to get an idea of the options you have heading back to the train station.
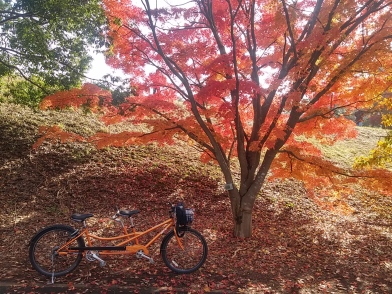
The arduous journey may seem like a such a chore but trust me when I say that it is worth it. Micah and I had the misfortune of visiting at time of minimal bloom yet we were still able to take approximately 8,724 pictures and had loads of fun riding a tandem bike around the park. To ensure that this doesn’t happen to you, I suggest you refer to this flower bloom guide.

Take your sweet time as HSP is MASSIVE. Fill your bag with food and drinks as there are plenty of ideal spots for a quick picnic. One whole day is allotted to allow you to experience everything the park has to offer, and since getting there took so long, it is best to maximize the trip.

On the way back, stop by Yokohama to get your fix of THE BEST RAMEN IN THE WORLD at Yoshimuraya.
There you have it, the first half of my recommended 10-day Japan Itinerary. I’ll be coming out with the second half by next week. Hopefully this first installment has you super excited about booking your trip to the land of the rising sun!
If you have any comments on the half-itinerary written above, feel free to leave them in the section below!

Hi. Can you help me to improve my blog? Please view my blog and follow me. Thank you. Have a nice day!
LikeLike
Hi and thanks for dropping by! Sure, I’ll take a look at your site.
LikeLiked by 1 person
Thank you 💞
LikeLike